Blogs

Mizuki Rework | Overwatch Design Studies

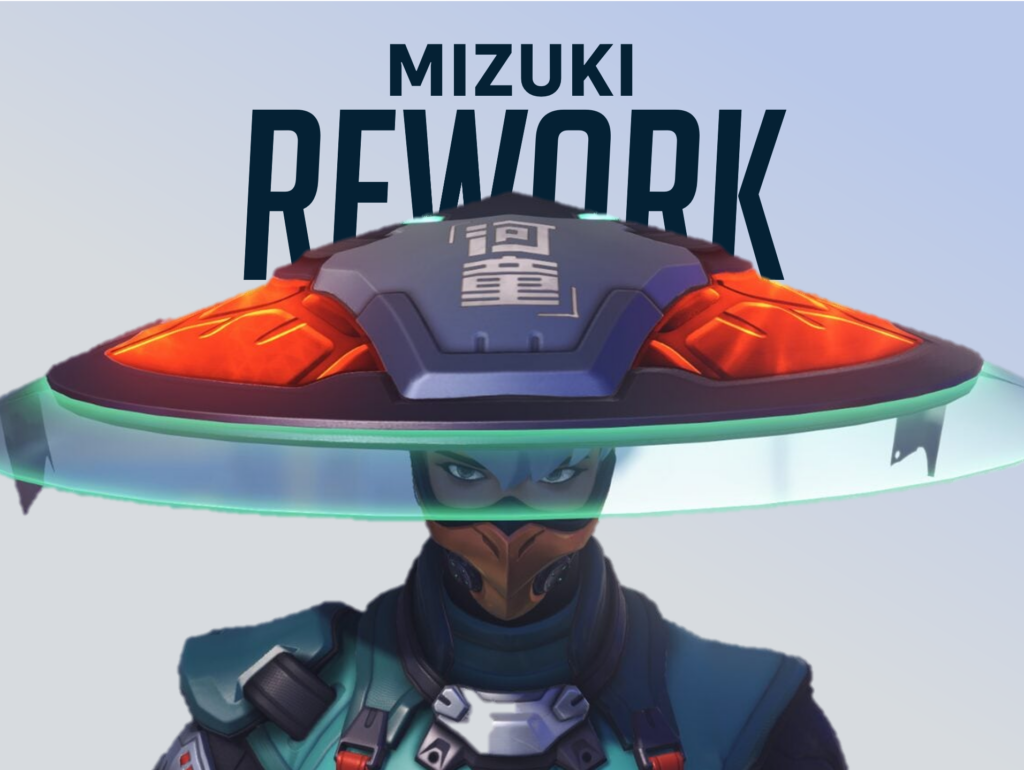
May 3, 2026 Nix Du 10:34 am Topic: Overwatch Design Studies Fan design of Overwatch’s heroes, levels, events, and balancing. Sort by: Best Expand Problem Mizuki is a character with satisfying gunfeel who has a little bit of tools against every comp. Immediately after Season 1 launch, a reddit post showed Mizuki being the community’s favorite character to play as among the 5 new heroes. However, since Season 2 his pick rate dropped substantially, and he started falling into a “Niche counter pick against niche heroes” trap. Mizuki’s abilities go into many directions and often contradicts themselves: Remedy Aura encourages staying main, and builds off much faster in a brawl environment Kashimoto Return encourages taking off angles, but is not enough to walk in with a dive comp Binding Chain is very strong against shieldless Dive tanks Kekkai Sanctuary is strong against Poke comps and ranged ultimates Other problems with his kit – Binding Chain is the only definitive reason to select Mizuki, making him a niche response pick against nice characters. Kashimoto Return’s offensive value is extremely map dependent. Its “Dash down, return to highground, shoot until it’s ready again” is very ideal and doesn’t fit in a committed Dive/Rush synergy. The reason why Mizuki’s weapon range is short is to restrict him from building Aura charge pre-fight, but this means sometimes he is left with nothing to do before enemies walk up. Goals Rework Mizuki towards a clear direction: Besides chaining Wreckingballs, what other situations is he useful for? Give various rework ideas Resolve Mizuki’s kit’s internal conflicts Give Hashimoto Return enough carry potential, so Binding Chain isn’t Mizuki’s only “carry” ability Changes Mizuki (Dive) Remedy Aura Charge and discharge rate increased by 150%. Now only charges or discharges during Kashimoto Return. Using Kashimoto Return immediately grants 50% charge. Charge remains at 0% when not using Kashimoto Return. Base healing increased by 35%. Combined with Kashimoto Return, these changes fits Mizuki into the typical burst cycles of a dive comp. Mizuki can be more comfortably dealing damage during Kashimoto Return. Wall Climb New passive. Allows Kashimoto Return to be used in more environments and more aggressively. Spirit Glaive Weapon range reduced from 30 to 22.5 meters. Encourages a more aggressive playstyle. Healing Kasa Projectile speed increased from 40 to 55 meters per second. Maximum bounce count reduced from 3 to 2. Healing increased by 10. (from 90/70/50/30 to 100/80/40) Makes Kasa a more intentional ability with less total healing but more saving potential. Kashimoto Return Duration increased from 5 to 8 seconds. Cooldown increased from 12 to 15 seconds. Recall cast time increased from 0 to 0.25 seconds. Allows Mizuki to participate in a dive for longer, while his downtime remains the same. Cast time is increased to match Sombra’s translocator, making it a less frustrating escape for enemies. Mizuki (Brawl) Kashimoto Return Now has “Quickstep” major perk as base kit. Area speed boost increased from 25% to 45%. No longer grants additional self speed boost. Allows Mizuki to replace Lucio, Juno, or Symmetra to speed and rotate a brawl comp. Binding Chain Hinder duration reduced from 1.6s (other) and 1.2s (tank) to 1.3s (other) and 0.9s (tank). Smaller hinder window encourages Mizuki to stay with his team and rely on ally focus fire on the chained target. Kekkai Sanctuary Healing reduced from 50 to 30 per second. Now applies 30% slow to enemies crossing its border. Now grants 75% Remedy Aura charge on cast. Kekkai is only good when your team is holding their ground, and when enemies aren’t all jumping inside. The slow effect allows the ability to act as a soft barrier as your team are forced out of it, or as a trap to help your team chase down escaping targets and bring the fight forward. The Aura charge grant allows Mizuki to skip the poking period and initiate a fight with full aura. Quickstep (Major Perk) Now a part of base kit. Piercing Glaive (Major Perk) Added. Spirit Glaive pierces through enemies until its first bounce. Helps Mizuki build up healing faster in a brawl. The shots stop piercing after bounce, reducing unexpected AOE spam. May 3, 2026 Nix Du 10:34 am Recent Posts Lastest Mizuki Rework | Overwatch Design Studies Sanjay Hero Design | Overwatch Design Studies Mama Hong Hero Design | Overwatch Design Studies
Sanjay Hero Design | Overwatch Design Studies

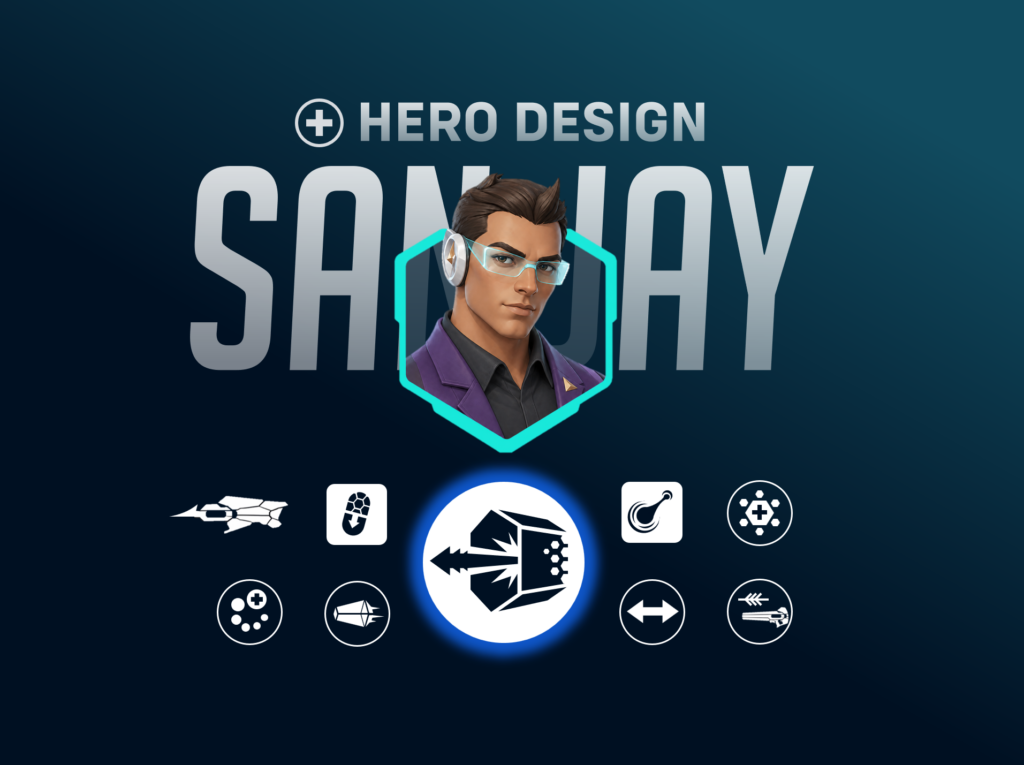
April 28, 2026 Nix Du 9:56 am Topic: Overwatch Design Studies Fan design of Overwatch’s heroes, levels, events, and balancing. Sort by: Best Expand Menu 💡View Design Process ⬇ Hero Info “Order is liberation.” Using one-of-a-kind technologies, Sanjay executes necessary evil under Vishkar and Talon, shaping the world into his vision of absolute order. RoleSupport SubroleSurvivor Health100 health + 150 shields Perk XP1700 (minor) 4500 (major) You can try Sanjay’s Ultimate Ability on this webpage. Scroll to his ultimate ↓ Passives Subrole: Survivor Passive️ Movement abilities start passive health generation. Notes Ideation Voice Lines Tap to fire only the bolt. Hold to keep spraying the beam. 1.2s of beaming triggers the explosion, and makes the weapon recover for 0.3s before shooting another bolt. The beam disconnects but keep spraying when target is out of LOS or beyond Tethering Range (18m). Player can still spray the beam when bolt misses or after the beam disconnects. The beam’s trailing is more forgiving than Moira’s, but less than Sierra’s. Shoot only bolt headshots for maximum DPS potential. Yes, this weapon feels like a tazer 🙂 Sanjay’s weapon was one the earliest part in his kit to be confirmed. I wanted the weapon to perform like the reverse of Domina’s, and inherit OG Symmetra’s flexible beam. Until around March, the beam was designed to tether to the target until LOS breaks. After Sierra is revealed, and receiving feedback from other designer friends, I differentiated Photon Lance from Sierra’s Tracker Shot by moving a big chunk of damage to the end of each shot as an “explosion”. This gives the enemy a defined period to break LOS, and also requires Sanjay to constantly reapply bolt shots. “Trace established.” “Detonation!” On elimination: “One at a time.” Reconstitution Passive️ Healing allies restore your shields and barrier. Shields restore rate: 20% of healing done Barrier restore rate: 120% of healing done Additional notes Shields restore rate is half as fast as the Medic subrole passive’s self-heal rate. Barrier restoring applies to Sanjay’s ultimate, where he can repair his prism shaped barrier by ~100 per second. Weapon Photon Lance ️ Type Weapon (Primary Fire) Effect Type Projectile + Projectile beam Bolt shot that tethers a beam to its target. Explodes on continuous beaming. Damage: 60 (bolt) + 72 over 1.2s (beam) + 40 (explosion) Headshot: √, 2x (bolt) Fire Rate: 1 shot per 0.5s (bolt only)1 shot per 1.6s (bolt and full beam) Projectile Speed:90m/s (bolt and beam) Beam tethering range:18m Beam maximum range:30m Explosion radius:3m Ammo:100 Ammo cost:5 (bolt) + 12.5/s (beam) Reload time:1.5s Additional Notes Ideation Voice Lines Tap to fire only the bolt. Hold to keep spraying the beam. 1.2s of beaming triggers the explosion, and makes the weapon recover for 0.3s before shooting another bolt. The beam disconnects but keep spraying when target is out of LOS or beyond Tethering Range (18m). Player can still spray the beam when bolt misses or after the beam disconnects. The beam’s trailing is more forgiving than Moira’s, but less than Sierra’s. Shoot only bolt headshots for maximum DPS potential. Yes, this weapon feels like a tazer 🙂 Sanjay’s weapon was one the earliest part in his kit to be confirmed. I wanted the weapon to perform like the reverse of Domina’s, and inherit OG Symmetra’s flexible beam. Until around March, the beam was designed to tether to the target until LOS breaks. After Sierra is revealed, and receiving feedback from other designer friends, I differentiated Photon Lance from Sierra’s Tracker Shot by moving a big chunk of damage to the end of each shot as an “explosion”. This gives the enemy a defined period to break LOS, and also requires Sanjay to constantly reapply bolt shots. “Trace established.” “Detonation!” On elimination: “One at a time.” Photon Coating ️ Type Weapon (Secondary Fire) Effect Type Projectile Four-round homing healing bursts. Healing: 14/round Fire Rate: 4 rounds in 0.4s (+0.5s recovery) Projectile Speed:40m/s Lock-On Range: 25m Ammo:32 Additional notes Voice Lines Projectile locks onto an ally within 25m, and still have a slight auto-homing beyond that range. Alternate between damage (left) and heal (right) to maximize total output. “Hard light reinforcement.” “Restoring structural integrity.” Abilities Compliance Capsule E️ Type Ability Cooldown 15 seconds Effect Type Arcing Projectile Release an exploding capsule that weakens enemies, reducing their damage dealt. Projectile Speed:30m/s Explosion Delay after landing:0.2s Explosion Radius: 4m Explosion Damage: 5 Damage Reduction Rate:50% Weaken Duration:2.5s Additional notes Voice Lines The Capsule rolls for 0.2s before detonating. Weakened enemies get audio and VFX feedback, plus a sound filter to make hits sound lighter. When there’s more than 1 Sanjay on a team, their Weakens don’t stack. Weaken is subtractive, not multiplicative. A player with nano boost (150% damage) drops back to 100% when weakened. “Neutralizing aggression.” “Pacification complete.” “Stand down!” Prime Vector Shift️ Type Ability Cooldown 14 seconds Effect Type Movement + Area Shoot a floating zipline that moves allies on interact. Zipline’s endpoint can be destroyed. Deploy Time:0.5s Max Distance:25m Zipline Speed:18m/s Zipline Uptime:6s Zipline Endpoint Health:125 Additional notes Voice Lines Zipline can start and end in the air, not attached to any surface. Zipline is two-wayed, but only its endpoint (not origin) has the destroyable device. Press interact to attach to zipline and start moving towards the direction based on player’s movement input before connecting. Players on zipline are vulnerable to most hard and soft CCs. Press Jump to detach and jump off the zipline. Like Teleporter, a player need to wait for 1s before using it again. Sanjay can hold Shift to immediately start ziplining after casting. Sanjay’s Photon Lance beam can still tether enemies while ziplining. Zipline’s interact priority is lower than Teleporter and Lifeline, but above everything else. “Position realigned.” “Moving important personnel.” Converged Amplifier Q Type Ultimate Ability Cost 2250 pts Effect Type – Fly up in a prism shaped barrier with no front or rear protection. Fire faster with infinite ammo. Enter third person view when healing. Cast Time: 0.6s Duration: 8s Barrier

Mama Hong Hero Design | Overwatch Design Studies

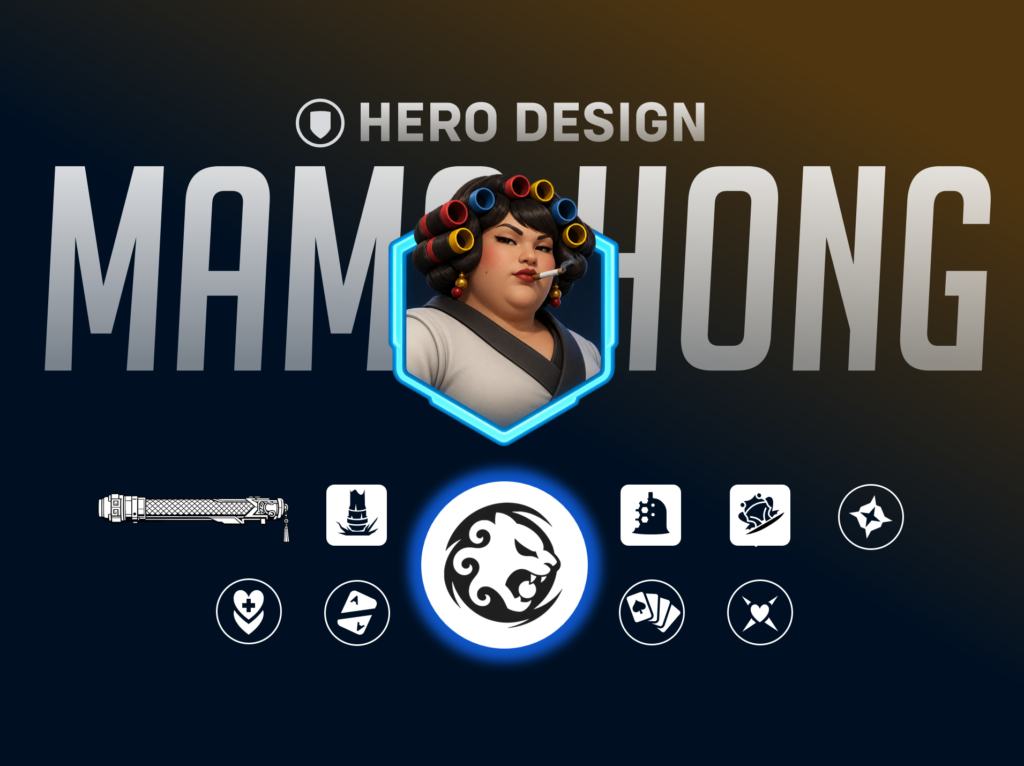
April 28, 2026 Nix Du 5:00 am Topic: Overwatch Design Studies Fan design of Overwatch’s heroes, levels, events, and balancing. Sort by: Best Expand Menu 💡View Design Process ⬇ Hero Info “Float like feather, strike like steel.” A reputable landlord and a legendary WuXing metalbender, Mama Hong came out of retirement to protect her land against Talon-affiliated forces. Full Name洪滿山 (Hong Mun Saan) RoleTank SubroleInitiator Health450 health + 175 armor Perk XP1700 (minor) 4400 (major) Mama Hong is a dive tank with decent poke capability. Drawing inspiration from Hazard and Mauga, she makes space by marking enemies with Concussion from a distance, exposing them to Manslaughter’s impact. By hitting skill shots midair, she can dive into enemy backlines and do heavy damage. Her ultimate is a combo of Soft CC + Survival like Orisa’s Terra Surge, but is vulnerable to multiple enemy sightlines. She makes up for it with a long range finisher. Passives Subrole: Initiator Passive️ Gain a heal over time from using movement ability. Concussion Passive️ Quick Melee and Primary Fire apply Concussion, making enemies vulnerable to Manslaughter. Duration: 4s Additional notes Voice Lines Narratively, Mama Hong is a master of the Metal Wuxing element. Unlike Anran’s Ignite, tanks don’t have extra consussion resistance. Concussion don’t have any effect besides enabling Manslaughter’s detonation. Concussed enemy hears a dull metal sound and sees subtle ripples on the corners of the screen. Weapon Rising Maw ️ Type Weapon (Primary Fire) Effect Type Arcing Projectile Arcing cannonballs that apply Concussion on direct hit. Cast Time: 0.3s Damage: 40 (Impact) + 10~50 (splash) Splash radius:2.5m Rate of fire:1 round per 0.9s Projectile speed:50m/s Projectile radius:0.325m Ammo:5 Reload time:1.5 seconds Additional notes Voice Lines Each shot has a cast time like mei, and a falling arc like torbjorn. Splash damage doesn’t apply Concussion. Visually, the explosion is a golden ripple with a bell-like sound. Elimination: “Crushed under the might.” Elimination: “Daa dou nei saang saai!” (Crushed to pieces!) Abilities Manslaughter E️ Type Ability Cooldown 8 seconds Effect Type Area + Targeted Slam weapon to send enemies upward. Implode Concussed enemies hit. Cast time:0.5s Impact radius: 12m Implosion Delay:0.6s Damage:5~25 (shockwave) + 100 (implosion) Launch height:3m Additional notes Voice Lines Shockwave is blocked by environment and barrier. Shockwave is spherical. The shockwave launches enemies lower than Wreckingball’s Piledriver, but disrupts enemy movement all the same. Manslaughter. “Reverberate!” “Baau! (Implode!)” “Break!” Toad Pounce Shift️ Type Ability Cooldown 8 seconds Effect Type Movement Leap onto a wall and launch yourself from it. Damage: 25 Leap range:12m (arc) Max duration on wall:2s Launch range:2026m (arc) Additional notes Voice Lines When landing on a wall, Mama Hong can stick to the wall for up to 2s, during which she can choose to drop off or leap off it. Mama Hong can attack or use Manslaughter when leaping or on a wall. Cooldown starts on the second leap. A subtle shout on jump, and a toad sound on wall-landing. On regular landing: “Featherweight!” Iron Mantle ️ Type Ability Cooldown 8 seconds Effect Type – Maintain a bowl-shaped barrier and take half of its damage mitigated. Barrier dimension:2.25m radius hemisphere Barrier health: 450 Barrier duration: 0.4s ~ 3s Move speed penalty: -40% Additional notes Voice Lines Can be cancelled early. The barrier moves and turns with Mama Hong, but doesn’t block attacks from within or behind. Mama Hong can’t attack during Iron Mantle, except Quick Melee. Since Mama Hong takes half of its damage mitigated, enemies can see and hear hitmarkers when hitting the barrier. “Sanctuary!” “Gam Dzung Dzau!” (Golden Bell Shield!) On barrier broken: “Caang m’ zyu laa!” (Can’t hold it anymore!) Lion Roar Q Type Ultimate Ability Cost 2150 pts Effect Type Area + Projectile Beam Inhale to slowly pull frontal enemies and absorb frontal projectiles, then release a soundblast with knockdown. Rrange: 16m, 55° cone (Pull, Absorb, Soundblast) Duration: 2s~4s Pull speed: 2m/s (first 0.5s) 8m/s (after 0.5s) Soundblast damage: 125 Soundblast Knockdown duration: 2s Additional notes Voice Lines Mama Hong can look around but can’t move, attack, or cast abilities during Lion Roar. Barriers block the pull and soundblast. Casts instantly. To enemies/self: “SII…” “HAAU!” To allies: “Lioooon…” “Roar!” On elimination: “M’ sai zang zaat!” (Don’t even try fighting back!) Perks Brute Force Minor Perk Imploding an enemy grants 35 overhealth. Borrowed Force Minor Perk Lion Roar releases all projectiles inhaled. Feather Steps Major Perk Toad Pounce can leap for a third time if the second leap lands on a wall too. Echoing Bell Major Perk Quick Melee hit during Iron Mantle applies Concussion to enemies within 6 meters. Design Process Hero Fantasy Mama Hong has been the forbidden knowledge of the community. Teased well before Overwatch’s 2016 launch, her “Manslaughter” ability was memed upon. Anyone who pays attention can find her resemblance of the Landlord Auntie in Kung Fu Hustle. This character is a spicy, blunt Landlady, who is also a kind hearted Kung Fu legend that mastered the skill of “Lion Roar“, using soundwave to destroy enemies and even buildings. She also puts up great defense using her “Chi”. It’s been my obsession to make Mama Hong into a real hero that uses “Manslaughter”, “Lion Roar” and “Chi” defense. I also want to shed lights upon other Kung Fu skills in the movie, like “Toad Stance” and “Iron Ring Punch”. Dual Weapon? Marks? Gameplay wise, I initially wanted her to be a dual weapon bruiser. Unlike Torbjorn and Mercy, she will actually use both weapons with maximum efficiency. I also gave her the “marker” gameplay identity: Mark enemies with ignition, then make them combust. Enemies marked will think twice before engaging Mama Hong, hence space is made. Her two weapons both feature a left click (normal attack) and right click (special attack). Using special attack makes her switch to the other. So her flow will be: Attack – Special (switch) – Attack – Special (switch)… Rising Maw (Old) Wpn1 Reworked for: Too many ignite effects in the game, resulting in unwanted team-up benefits.

Geiger Hero Design | Overwatch Design Studies

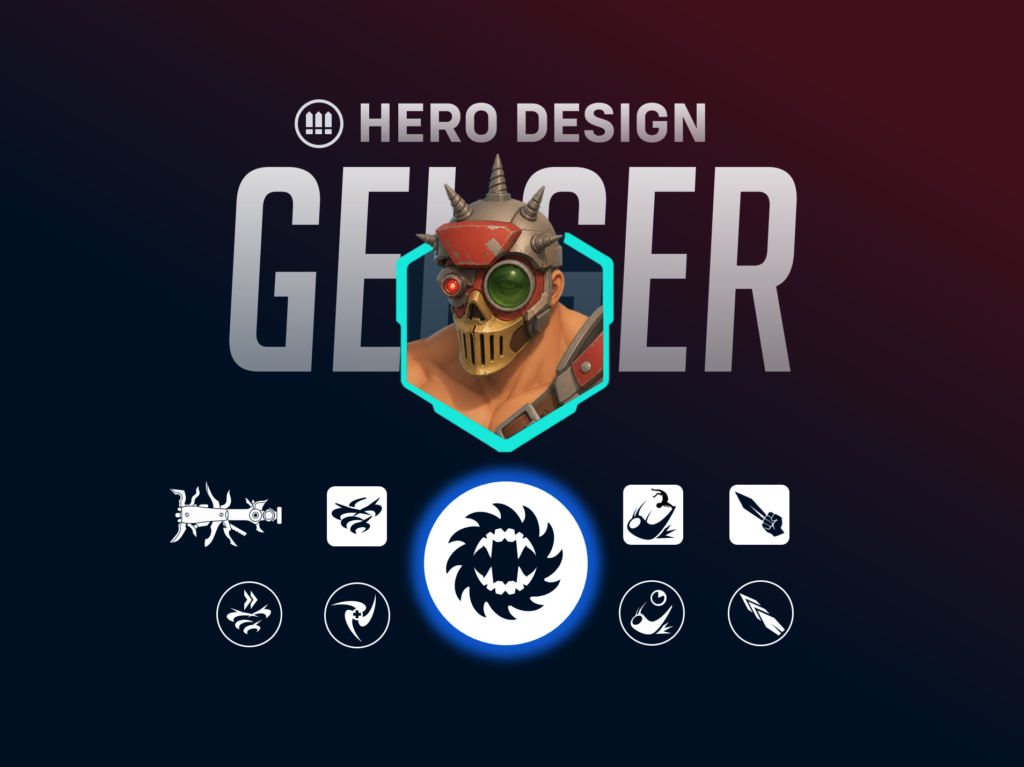
March 11, 2026 Nix Du 9:12 am Topic: Overwatch Design Studies Fan design of Overwatch’s heroes, levels, events, and balancing. Sort by: Best Expand Menu 💡View Design Process ⬇ Hero Info A raging maniac and a cold-blooded arena fighter, Geiger sworn his loyalty to Junkerqueen, and now serves as her right hand man to keep outcasts and invaders away from Junkertown. RoleDamage SubroleFlanker Health200 health + 50 armor Perk XP1750 (minor) 4600 (major) Official concept art from overwatch wiki Passives Subrole: Flanker Passive️ Health packs restore more health. Extra health restored: 75 Weapon Gutwrench ️ Type Weapon (Primary Fire) Effect Type Projectile Fast cycle of mid-range boomerang blades that pierce through enemies. Damage:20 (fly out) + 10 (return) Headshot:x Projectile Speed:70m/s Projectile Radius:0.25m Range:17.5m Fire Rate:1 shot per 0.2s Ammo:12 Reload Time:1s Additional notes Voice Lines Inspired by official concept art. Tap faster to fire faster with a shorter range. Hold to juggle the blades on maximum fire rate (1 shot per 0.25s) within 15m range. The blade returns between 0.25s (minimum) and on max range. Also returns when hitting map collision. Maximum DPS: 160 (15m, all body) 280 (15m, all crit) When enemies are beyond 15m, the player needs to tap fire based on enemy distance, recalling the blades at the right time so they don’t travel for unecessary distances. On elimination: “Come back here, ya little ripper.” On elimination: “Boomerang with teeth.” On elimination: “Bite this murder stick ya drongo!” On elimination: “That blade knows the way home.” Sneak Shot ️ Type Weapon (Alternate Fire) Effect Type Melee + Projectile Stab with a dagger. Hold to shoot it out. Projectile Cast Time: 0.5s Damage: 40 (stab) + 100 (projectile) Headshot: √ (1.5x) Projectile Speed: 125m/s Projectile Size: 0.15m Ammo:1 Reload:Passive reload, 4s Notes Voice Lines The punch is exactly the same as Geiger’s Quick Melee, effect wise and category wise. This alt fire provides lethal close-range threat and supplemental long-range finisher. Primary fire is still better between 3-15m range. “Oi, hold this for me.” “Little sting for ya.” “Blink and bleed.” On elimination: “Knife in the pocket, mate.” Abilities Cyclone E️ Type Ability Cooldown 6 seconds Effect Type Melee + Movement Spin and move in third person, reducing damage taken. Bounce towards current movement direction when hitting enemies. Duration: 2s Speed Boost: 300% for 0.45s (on initial activation)50% (default)300% for 0.35s (bounce on enemy hit) Initial Speed Boost: 300% for 0.35s Damage:50 Damage Reduction:65% Enemy Knockback:3m Additional notes Voice Lines When starting the ability or hitting an enemy, Geiger accelerates towards his current movement input. Each enemy can only be hit by Cyclone once per second. When multiple enemies are stacked or lined up, Cyclone can zip through them very fast. Cyclone is still vulnerable to all types of CC. “Try hittin’ the crazy bit!” “Full scrap tornado!” “Later, ya dogs.” On elimination: “You’re in the blender!” Vaultbreaker Shift️ Type Ability Cooldown 6 seconds Effect Type Melee + Movement Slam a crowbar to pole-vault into the air. Cast time: 0.3s Slam range: 4m Slam damage: 80 Pole vault cast time: 0.2s Pole vault distance: 6-12m (horizontal)3-8m (vertical) Additional notes Voice Lines The combined cast time before Geiger pole-vaults is 0.5s. Geiger can do a short/long/high jump by holding S/W/Space when casting the ability, similar to Winston’s Leap. Geiger can attack mid-air after a short recovery. “Open up!” “Crowbar down, Geiger up!” “Watch the landing, mate!” On elimination: “Broke ya bones!” On elimination: “That’s scrapwork, mate.” Rust Ripper Q Type Ultimate Ability Cost 2400 pts Effect Type Projectile Throw a sawblade frisbee to bounce between enemies and apply Bleed. Any melee hit refreshes the Bleed duration. Cast Time: 0.4s Projectile Speed: 40m/s Projectile Radius: 0.5m Bounce Range: 12m Damage: 100 (impact) + 125 over 2.5s (bleed) Additional notes Voice Lines When bouncing, sawblade becomes a strong projectile that can’t be mitigated by Defense Matrix, Kekkai Sancturary, etc. When bouncing, sawblade slightly homes but can’t hit target with no LOS. Bleed duration on enemy refreshes when they take melee damage from any source. To enemies/self: “Round trip through the meat!” To allies: “Saw out, limbs in danger!” On strikeback, to enemies/self: “One more round!” On strikeback, to enemies/self: “Do it again!” On strikeback, to enemies/self: “Stike thrice!” On elimination: “Bleed me a river!” Perks Blood Storm Minor Perk Gutwrench gain 15% lifesteal against enemies within 10 meters. Flexible Steel Minor Perk Cyclone bounces 20% further when hitting an enemy. Dopamine Crush Major Perk Vaultbreaker hit increases attack and reload speed by 25% for 2 seconds. Recycled Sharpenel Major Perk Alternate Fire hit refills Primary Fire’s ammo. Design Process Hero Fantasy In my heart Geiger is the coolest and the most definitive “Junker” by a huge margin. In the Wastelander cinematic, he’s a crazy fearless crackhead with a million different melee weapons. But at the same time he fights with intelligence and knows to respect an enemy with integrity. Geiger’s hero fantasy is a blade dancing brawler. Unlike Vendetta, he demands less resource to bounce between groups of enemies, and deals consistent mid-range AOE damage when enemies are pressed into tight spaces. Weapon To differentiate him from Vendetta, Reaper and Venture, I wanted Geiger’s weapon to be more range-flexible with one special gimmick. Initially, that gimmick was bouncing blades. But then Mizuki happened – maybe for the best, since the redesign is more focused and more skill-expressive. The redesign was inspired by Invisible Woman’s boomerang shots in Marvel Rivals, plus one twist: Player can increase the fire rate by tapping faster, at the cost of its range. Holding the key will juggle the blades at max fire rate and minimum range, making it almost feel like a magnetic chainsaw. Gutwrench (Old) Weapon️ Reworked: Brawler identity is not strong, player is encouraged to spam chokes and corners. 🖱Bouncing blade shots. 🖱Punch followed by a long-range dagger shot. Gutwrench ️ Final design – Alt fire moved to passive Piercing boomerang blade that flies back early when another blade is fired.[Hold to quickly

Doomfist Rework | Overwatch Design Studies

January 17, 2026 Nix Du 1:25 am Topic: Overwatch Design Studies Fan design of Overwatch’s heroes, levels, events, and balancing. Sort by: Best Expand Problem Doomfist is a unique tank hero with high skill expression, great carry potential, and a loyal core playerbase who enjoys his mobility and versatility. As of January 2026, Doomfist has the highest tank win rate in Bronze, and steadily gets less and less win rate as ranks go up; he has become a noob stomper, one reason why DPS Doomfist was so despised in Overwatch 1. This is largely due to: Slam engagement is weak post universal health buff Disrupt playstyle is unviable due to long downtime Over-reliance on empowered punch and Power Matrix Low error tolerance compared to other dive tanks Goals Lower skill floor and raise skill ceiling Reduce frustration against empowered punch Re-enable slam engage and disrupt playstyle Introduce a reliable Power Matrix alternative Improve consistency against more heroes Changes Doomfist Rocket Punch Damage increased from 25~75 to 30~80. Wall impact damage increased from 10~40 to 15~45. Empowered punch’s damage amplifier reduced from 1.5x to 1.4x. Empowered punch now makes distinct sounds on acquiring and casting. Empowered punch now displays a decay countdown timer. Doomfist’s empowered punch is currently his main play-maker and needs attention from both sides. Informing enemies of its threat creates an alarming expectation and reduces frustration. Normal Punch’s damage is increased by 5~10. Empowered Punch’s max damage is reduced by 8~12. Seismic Slam Gained “Aftershock” perk as base kit. Aftershock’s slow reduced from 40% to 20%. Cooldown in 6v6 Open Queue reverted to 6.5 seconds. Aftershock as a major perk was hard to balance between “unfun to use” and “unfun to play against”. On the other hand, base Seismic Slam has been underpowered compared to Rocket Punch for a long time. This change makes Seismic Slam a more intentional ability and improves Doomfist’s overall power. Meteor Strike Inner circle indicator is now visible to allies. Doomfist’s ultimate removes his presence from the battle, which is against his role purpose as a tank. This change gives Meteor Strike indirect shotcalling value. Minor perk: Survival of the Fittest Removed. The perk rewards winning fights or late fights more than a neutral or losing one. Doomfist is already good at resolving winning fights and late fights. Major perk: Aftershock Moved to base kit. Slow reduced from 40% to 20%. See “Seismic Slam” above. Minor perk: Successor’s Momentum Added. Cancelling an ability with another one reduces both cooldowns by 15%. Instead of buffing his default strategy, this new perk revitalizes his alternative disruptor playstyle, encouraging players to chain abilities for better angles, skillshot punches, and environment-based rollouts. Major perk: Quick Uppercut Added. Press reload to punch enemies upwards, dealing 35 damage. Cooldown: 10 seconds Damage reduced from 50 to 35 Impact range reduced from 5 to 3.5 meters Travel and knockback distance reduced from 10 to 7 meters Recovery time reduced from 0.35 to 0.25 seconds No longer freezes horizontal movement for both sides For a perk to compete with Power Matrix, it needs to grant equivalent tools to play around CC, and it needs to be fun to use. Uppercut is reworked to a dodge ability instead of a killing move. It enables more movement possibilities and does less CC than before. January 17, 2026 Nix Du 1:25 am Recent Posts Lastest Mizuki Rework | Overwatch Design Studies Sanjay Hero Design | Overwatch Design Studies Mama Hong Hero Design | Overwatch Design Studies April 28, 2026 Nix Du 5:00 am Topic: Overwatch Design Studies Fan design of Overwatch’s heroes, levels, events, and balancing. Sort by: Best Expand Problem Compared to her (imperfect) predecessor – DPS Doomfist, Vendetta has improved her error tolerance, poking, telegraphing, and, of course, the frustration to fight against her. However, she still has the problems below: Over reliance on snowballing Pre-fight poking harms mid-fight sustain  Busy VFX and audio Changes The two changes below gives Vendetta a unique resource management system. She needs to alternate between Projectiles and Block to maintain a balance, improving her poking ability under ranged fire and penalizing perma-blocking. When flanking/spawncamping, Vendetta also needs to decide: Should I strike with a half-full meter, or should I throw a projectile to drain it first, at the cost of being heard? Warding Stance Energy meter is now divided into 5 equal sections and refills only up to to 40% Mitigating damage now fills energy meter instead Vendetta loses Warding Stance, Projected Edge, and Onslaught for 3 seconds when energy reaches 100% Projected Edge Cost reduced from 30% to 20% (1 section) Damage reduced from 70 to 60 Palatine Fang (Weapon) Each strike’s audio signaling volume doesn’t reflect their impacts accurately enough. Normal swings now makes less sound Overhead slash now makes a wind-up sound, similar to Junker Queen’s Carnage Minor Perk “Relentless” – Removed Already over-reliant on snowballed brawling, Vendetta needs an option to deal with longer maps and slower fights. Minor Perk “Bottomless Malice” – New This perk offers the option of more range and less block when a fight begins. “Energy meter automatically refills up to 80% instead of 40%.” Major Perk “Swift Vengeance” – Removed This perk is very situational, and Vendetta has little control over how it works. Minor Perk “Gut Punch” – New Vendetta’s Quick Melee attacks can be weaved into her swings smoothly, but so far there’s little reason to do so.   “Quick Melee after Palatine Fang’s side swing deals 60 damage over 5 seconds.” This perk unlocks new combos, hitting/approaching key health thresholds: swing+melee+dash (215 total) swing+swing+melee+dash (260 total) swing+swing+melee+overhead (260 upfront, 320 total) Problem Doomfist is a unique tank hero with high skill expression, great carry potential, and a loyal core playerbase who enjoys his mobility and versatility. As of January 2026, Doomfist has the highest tank win rate in Bronze, and steadily gets less and less win rate as ranks go up; he has become a noob stomper, one reason why DPS Doomfist was so despised
Maximilien Hero Design | Overwatch Design Studies
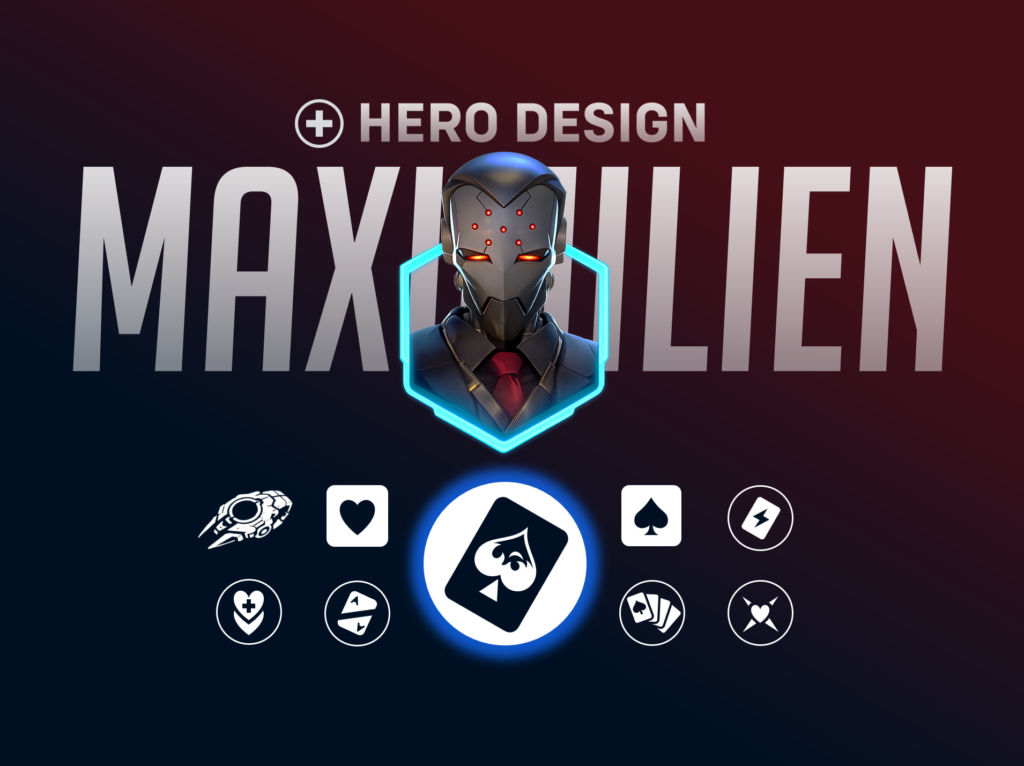
January 13, 2026 Nix Du 4:33 am Topic: Overwatch Design Studies Fan design of Overwatch’s heroes, levels, events, and balancing. Sort by: Best Expand Menu 💡View Design Process ⬇ Hero Info Aside from his position as Talon’s accountant, Maximillen is the figure behind many impactful events. Gambling on the edge of conflicts, he uses wealth and connections to build his own power. RoleSupport SubroleTactician Health150 health + 100 shields Perk XP1750 (minor) 4600 (major) Passives Subrole: Tactician Passive️ Store excess ultimate charge. Ult charge stored: up to 25% Backed Hand Passive️ Give your excess ultimate charge to your Ace. Ult charge given: up to 25% Additional notes Voice Lines Ace is selected with Max’s ultimate “Ace in Play”. Only grants excess charge stored via the Tactician subrole passive. Grants via ult points instead of fixed percentage. The target ally hears a surging sound on activation. Weapon Executive Wristwatch ️ Type Weapon (Primary Fire) Effect Type Hitscan Two-round burst hitscan weapon. Damage: 40 (per round) Headshot: ✓ (x2) Rate of fire:2 rounds per 0.8s (0.3s between the two rounds) Ammo:24 Reload time:1.5 seconds Additional notes Voice Lines Shot radius: 0.12m (same as Illari) Damage falloff range: 25-45m (longer than Ashe, shorter than Illari) Damage falloff rate: 50% Recovery time reduces when alternating between primary and secondary fire. Elimination: “The house always wins.” Breach Laser ️ Type Weapon (Alternate Fire) Effect Type Beam – Hitscan Three short beams with a rotating triangular spread. Damage: 135/s (45 per beam) Headshot: x Range: 15m Spread:3.6 degrees (initial) – 2 degrees (after 0.75s) Additional notes Voice Lines Beam radius: 0.1m (less than Symmetra’s minimum radius) Rotation speed: 180 degrees/s Narratively, Max uses this weapon to cut holes on doors and walls, hence the name and the spinning 3-dot pattern. Elimination: “Think twice before you get close.” Abilities Spade E️ Type Ability Cooldown 8 seconds Effect Type Melee + Projectile Slash with a card and fling it out. Place a Spade on enemies hit, allowing allies to lifesteal from them. Damage: 40 (slash) + 40 (projectile) Headshot: x Slash Range: 4m Projectile Speed:70m/s Projectile Size:0.35m Spade duration:4s Ally Lifesteal Rate:30% (15% on tanks)Stops applying when ally already has more than 40% lifesteal. Additional notes Voice Lines The slash and projectile themselves lifesteals too. The slash’s animation allows enemies at range to react to the following projectile. Enemies with Spade see a overlay effect on their screen. Healing from Spade charges Max’s ultimate ability. To self/target: “Bleed the pot.” To allies: “Claim your cuts from them.” Heart Shift️ Type Ability Cooldown 1 second Effect Type Targeted + Area Place area healing on an ally, which grants movement speed too when an enemy is eliminated inside. Selection Range: 25m Area Healing: 25/s Area Healing Radius: 12m Speed/Damage Boost:25% Boost Duration: 2.5s afer elimination Additional notes Voice Lines Max cannot place Heart on himself. Heart expires after losing Max’s LOS for 5 seconds. “Go earn your healings.” “Make my investment worth it.” “Go, impress me.” On elimination: “Well done.” On elimination: “Stay in motion, agent.” Ace In Play Q Type Ultimate Ability Cost 2400 pts Effect Type Targeted Place an Ace on an ally. The ally instantly revives for one time during the effect, then places a Spade on their eliminators. Enemies don’t know who carries the Ace until they get very near. Selection Range: 25m Cast Time: 0.6s Initial Healing: 100 Ace Uptime: 7s Ace Reveal Range: 5m Ace Health On Revive:Up to 350 Additional notes Voice Lines Enemies can hear when Max ults, but can’t see the Ace icon over the ally until they’re up close. All enemies see the Ace icon from the moment when one enemy sees it. Ace’s secrecy enables lots of mind games for example, Max can place the Ace on himself, but tell an ally to charge in anyway, tricking the enemies into thinking the ally have the Ace. The Ace cannot revive from an environmental death. With Max’s passive, he always gives excess ult charge stored to his Ace. This can be used to quickly ready an important ally ult. In the middle of the fight, Ace’s 100 instant healing can save an ally, but might also spoil who received it. On deploy, to enemies: “An Ace is on the table. Play wise.” On deploy, to Ace/self: “Fear nothing, my Ace!” On deploy, to allies: “Ace has been deployed.” On revive, to enemies: “YOU MISPLAYED.” On revive, to Ace: “Now, shall we continue?” Perks Contingency Minor Perk You can damage and kill your Ace. This puts a Spade on yourself too. Feed the Greed Minor Perk Hitting enemies with Spade restores ammo. Shared Pot Major Perk Heart’s radius increases by 50% for 3s when an enemy is eliminated inside. Liquidation Major Perk Reset Spade cooldown when your Heart carrier dies. Design Process Weapon Weapon feels closer and closer Max’s identity as they iterate. After Zen and Lucio, Max will be the third support that doesn’t heal with a mouse button. The House ️ 🔫 Discarded for: Identity mismatch. Leave the red dot weapon for a pistol oriented DPS. Smart pistol with red dot scope. Executive Wristwatch ️ Discarded: Projectile shots encourages choke spam, not a match for Max’s personality of precision and calmness. Four-round burst dart projectile weapon. Tracker Chip ️ 📟 Discarded for: Discouraging enemies to engage for half of the fight. Make your next shot reveal target position. Press again to detonate the chip. Executive Wristwatch ️ Final design Two-round burst hitscan weapon. Breach Laser ️ Final design – first “shotgun beam” in the game Three short beams with a rotating triangular spread. Sustain Max started with a “mobility + self sustain” ability, borrowing the tech of Kiriko’s clone power in Stadium. I then wanted to jump out of the “movement and heal” cliche and design a different sustain ability. “Marking enemies for lifesteal” came to mind. After a few changes, the ability allows Max to do the “Slash and Laser (alt fire)” combo to survive close combat.

Winter Wonderland Returns – Event Design | Overwatch Design Studies
Topic: Overwatch Design Studies Fan design of Overwatch’s heroes, levels, events, and balancing. Expand In this blog I give 5 feature ideas to make the most interesting Winter Wonderland event ever. Goals: Make old players tear their eyes. Make new players hooked by the game mode(s). New progression and monetization loops. Upcycle obsolete content frugally. Some of these features below can be stretch goals. With one game mode + Affinity Shop as the core, the event already has great retention and monetization potential. Quickplay: Thawed A surprise game mode where players are frozen at death’s door, and can be thawed by allies before being eliminated. Repurposed from Freezethaw Elimination (Winter Wonderland 2021). Entrance: Inside Quickplay Tab (similar to Quickplay: Hacked). Existing rules: On reaching 1 health, player becomes frozen inside an ice cube and can’t move, attack, or use abilities. They can still ping and send voicelines. Players can thaw frozen allies by holding interact for 2 seconds. Thawed players return to 50% health. Updated rules: No longer a Team Deathmatch. Game modes include all active Quick Play modes, plus Clash and 2CP. Player dies after being frozen for 12 seconds, then immediately respawns. Thawed players can’t contest the objective, and can be crushed to explosion by payload, barricade, or moving environments. Perk system is replaced by unique Freezethaw Perks. Minor perk – Area Thaw: Thawing an ally also thaws allies within 8 meters. Minor perk – Cryo Blast: Explode and damage enemies on thawed or death. Major perk – Who Did It?!: Gain 33% ultimate charge when thawed. Major perk – Discount Coulder: When frozen, roll in a small ice ball to knock enemies back with no damage dealt. An effective way to make quickplay less sweaty than ever. Death is less punishing, more fun, and can even be rewarding with Freezethaw perks. Snowball Fight Evolved Brings back Mei’s Snowball Deathmatch mode, a well acclaimed mode since the beginning of Overwatch with additional rules. Existing rules: Two teams of 6 players begins in Ecopoint Antarctica as Mei. Mei’s weapon can only fire 1 snowball, and can’t be reloaded. Snowball hit instantly kills the enemy. Mei can interact with snow piles on the ground to refill the snowball ammo. Mei’s ultimate lets her repeatedly shoot snowballs with infinite ammo. New rules: Is now 8-12 player FFA. Map pool now also include Antarctic Penninsula’s three locations, King’s Row Winter, and Hanamura Winter (all partially blocked). Jump pads are placed on the maps.  Snow piles appear more frequently on the maps and takes less time to gather. Cryo Freeze and Ice Wall lasts shorter. Mei’s Ultimate lasts shorter but charges faster, and boosts her jump height above Ice Wall’s height. Mei gets Unique perks in this mode: Minor perk – Ice Pillar: Remains the same Minor perk – Recycled Snow: Parrying snowball with Cryo Freeze refills 1 snowball. Major perk – Cryo Landing: Falling during Cryo Freeze stuns nearby enemies. Major perk – Freeze Jet: Hold Alt fire when not near a snow pile to blow air and levitate. Low effort (maybe? depends) to bring back a loved, nostalgic game mode.  A more balanced mode than, say, Cachimari Deathmach, and also unique enough to gather attention from new players. Maximilien’s Affinity Vault During the event players can level up Maximilian’s vault by completing tasks, refreshing the listings with a bigger discount. Event currency: golden tickets (reskin from 2025’s cookies) Complete an event task to earn 3 tickets. Event bundles come with 10 tickets. Use 3 tickets to level up the vault and refresh all listings. The vault has 5 levels. Starting from 15-30% discount at level 1, each level increases the discount by 10%. Upon reaching max level, players can keep refreshing the vault with 3 tickets. UI workload is frugal: Only a hud displaying tickets, level, and refresh button is needed. Well, rules are displayed too. This addition makes the vault feel less like clearance sale, and more like a well-earned achievement. Refreshing the list not only brings Gatcha randomness to the vault, but also makes FOMO effect happen many times through the event. Players are more motivated to buy bundles. Christmas Giftbox Endorsement becomes a way to give other players loot boxes. After a match, the “Endorse” icon and interface is dressed up into a recolored “Send Gifts” interface. Endorsed players receive a Christmas Giftbox and are notified in text chat. Christmas Giftboxes are regular loot boxes with a higher chance to give Christmas themed items. The Giftboxes also have a chance to give Golden Tickets and Coal. Event Currency: CoalCollecting Coal can complete Coal-related event tasks, unlocking special player titles. 1 Coal collected: “Bad Kid” 3 Coal collected: “Evil Gremlin” 5 Coal collected: “Professional Brat” A player can receive up to 3 giftboxes per day. Keeps endorsers and the endorsed ones in loop of event content. Builds player habit of endorsing. Souvenirs Rework Make Souvenirs fun! Players can throw out a random equipped souvenir by saying “Hello” in spawn room before the battle. The stills of the souvenir emote is made into victory poses. Souvenirs can be kicked around in the spawn room, and can score at the basketball hoop. Legendary Souvenirs Rare souvenirs that are bigger. Comes with a VFX and a SFX when being thrown out or kicked around in spawn room. Low effort feature to make obsolete systems meaningful again.

Designing 5 Levels… To Be Played At Once. Overlapped. (GGJ2023)

Introduction Tale of Bagua is a 4D puzzle game developed by a team of three, in which the player overlays portals to access different times in the past. Portal effects are multiplied in the overlapped area, creating a kaleidoscope of historical events. Its idea was sparked on Global Game Jam 2023 and its demo was designed from scratch in 16 hours. Level Design: Making intricated puzzles with 5 overlapping mazes Now that the core mechanics are done, how to make this “switch world, pass obstacle” trick complex and fun? As a Level Designer, these are the directions I’m going for: More switches and deeper switches. To collect the heirloom in each level, a player needs to switch multiple times. The deepest ones go across multiple levels. More walking and no sitting-still solution. The player has to explore the entirety of a new level before, on top of switching worlds, in order to get the heirloom. And these are the solutions I applied: 3 shared spaces with neighboring levels. A level should share at least 3 spaces with the previous and following levels. These 2 sets of shares spaces should avoid overlapping. No shared space with 4 levels in a row. For example, level 1-4 can’t share the same vacant space. Avoid large vacant spaces. Use long alleyways and small spots. Each level has a distinct color pallet. The deeper a level is, the simpler and more monotonic its visuals are. Level 2, the first level involving a portal, has 6 shared spaces between 2 layers. The player has to switch 3+ times. Layer 1 (2023, Present) Layer 2 (2015, Wild fire) Layer 3 (1959, Great Leap Forward)) Layer 4 (1511, Ming Dynasty) Layer 5 (2073BC, Pre-Xia Dynasty) Previous Next What went well Mechanic Design-wise, we fully achieved what we wanted to have in the game.Level Design and difficulty-wise, we created intricate puzzles that took our players over 30 minutes to complete. For a 16-hour project, it’s more than enough.Our focus on whiteboxing paid us back with an almost bugless prototype.The concept and narrative fit extremely well with the Game Jam’s theme “roots”, telling a story of a Chinese kid who uses his family heirloom “Ba Gua Mirror” to travel back in time, searching for his ancestors. What went wrong As a producer, I focused too much on playability and didn’t manage the 3D art tasks effectively enough, leading to many last-minute visual problems.As a level designer, I went all in to design the most sophisticated puzzles and didn’t care about making a tutorial. This results in the new players not knowing the basics.It’s almost impossible to see anything when the player is at the final level. It’s an actual kaleidoscope with 20+ sections. Only one of them shows level 5, and you need to peek through that tiny hole to find your way.The ending of the narrative is rushed and didn’t reveal the plot well enough. What next We want to make a whole series of games with this mechanic because of how brilliant and refreshing it is. Here’s what we will do. Mechanic Design Make the portals easier to control. More UI elements to indicate the layering. Add responsive animations. Add a fullscreen option that expands selected portals to cover the whole screen, so that you won’t be peeking through a tiny slit when you’re 5 levels deep. Add conversations and other narratively beneficial things to increase story density. Add mini puzzles to increase overall variety. Level Design Playtest multiple times to re-adjust the difficulty curve. Add a tutorial level. Make the first chapter easier, at about 15 minutes avg playing time. When everything is set, we are ready to make chapter two. Visuals Bake each level individually. Optimize assets and palettes. Make sure every part of a level is equally recognizable on first glance. Narratives Add more motives to the main character’s actions. Explain more about the heirlooms: what is a Ba Gua mirror? How is it related to Ying Yang and Chinese history? Why can it bring us back in time? Summary Tale of Bagua is a success for 16 hours of work in a 2-day game jam. We want to push the idea further by finishing other aspects. Our short-term goal: make one interesting, polished, and visually stunning chapter to pitch our game for potential investments. Game Detail Play in browser

Learning the World While Surviving: Green Hell’s Metroidvania-Style Open World and Environmental Storytelling

1100 words | 3 minutes | Spoilers Survival games got me obsessed again lately. A potential survival game designer role urged me to revisit this genre, so I went through a selection one by one: Green Hell, Rust, SCUM and No Man’s Sky. None of them made me feel like I was on a mission. In fact, these highly-rated survival games drew my attention as a player as much as a designer. Among these 4 games, I have spent the most amount of time playing and dissecting Green Hell, an open-world hardcore Survival game for both singleplayer and multiplayer. Environmental storytelling in Metroidvania-like levels Green Hell’s canon storyline is composed of scattered pieces of memories, revealed little by little to the player behind a thick curtain of Amnesia. In the game, the player plays as explorer Jake Higgins, with a goal to find his wife Mia in the jungle. During the exploration, Jake and Mia will have frequent conversations over a Walkie Talkie; but soon the player will find everything suspicious: Jake seems to have been through the same search long time ago, and Mia’s words doesn’t make sense at all sometimes. Only at the end of the game will the player realize that Jake has gone insane because his past discoveries led to the death of millions including Mia, and was actually talking to himself the whole time. What’s unique about this narrative? It breaks down a main storyline and 3 short tales into pieces and smoothly weaved them into an open-world game play. The player will not be forced to do any specific task to recover these stories.  Aside from the storytelling, Green Hell’s Metroidvania-style map cut the map into several free-to-explore sections, with natural barriers in between that requires the discovery of a certain tool to pass through. This design prevents the player from getting spoiled before exploring the previous chapter thoroughly, further enhancing the feeling of “exploration”. Furthermore, with each tool added to the player’s backpack, the player will be able to unlock more optional points of interests and build camps in more remote locations. This mechanic gave the player a feeling of “leveling up” without an experience system nor a skill tree, keeping the difficulty and hostility of every map section around the same level. After ~50 hours in Green Hell and a handful of notes, I finally felt confident to examine its worldbuilding and narrative thoroughly. Before examining its pros and cons, let’s go over a list and a database I put together first. Jake’s illusion of Mia’s calls Jake recalls his past achievements through documents Green Hell’s playthrough, divided by sections S0 – Tutorial The player expects a two-people expedition, while learning the basics. The player now has almost no attatchment to Mia. Jake and Mia’s camp Cinematic (teleports the player into the next section) – About missing the evacuation S1- Abandoned small village The player spend most time learning to survive around a single camp, unaware of how big the world is. The player believes Mia is somewhere in the jungle. Backpack (ritual note, map) Ritual place (unlocks the stone gate) Stone gate & cinematic (unlocks the next section) – About the second visit to the jungle S2 – The cartel establishments The player realizes the others’ existence and starts to suspect Mia’s honesty. The player learns to track and move between multiple camps. Discoveries of multiple modern structures can be found here. Dock Drug factory (Finding a Jeep track leading to the abandoned Jeep) Jeep (Finding the fuel to enter the gold mine) Gold mine (Finding the grapple to access the ritual place “Lambda 2”) Wahara tribe Plane crash Ritual place “Lambda 2” (Unlocks the stone gate) Stone gate, canyon & cinematic (Unlocks the next section) – About how Mia had cancer S3 – Anaconda Island & Airstrip The player spends less time building upon repositioning multiple times.Upon Mia’s disconnection, Jake’s sanity and Mia’s intentions will be doubted, raising the player’s curiosity and concern. Anaconda island Airstrip Metal hut (Acquiring climbing gear for the deep well) Deep well (Acquiring scuba diving gear for the underwater tunnel) Underwater tunnel (Leading to the next section) S4 – Wetland & Omega camp The player needs minimal effort camping. The player learns that Jake had been here with a team, and feels guilty that Jake messed up their mission.Finding the cure solely depends on if the player thinks about the foreshadowing of catchable frogs. Omega camp Ritual place “Lambda 1” (Unlocks the stone gate) Stone gate & cinematic (Getting into the enclosed cave) – Memories about curing cancer – Memories about the spread of an unknown deadly virus Enclosed cave (Acquiring the grappel gun needed for the next section) S5 – Yabahuaca’s land The player doubts Mia’s fate upon seeing the destroyed village. Almost no time is spent camping here, as an ending can be felt approaching.The player feels strongly attached to Mia and is very concerned about her potential death. Jake’s camp (now abandoned, hinting a surprisingly long time has passed since tutorial) Yabahuaca main village Ritual place (Activates the cinematic) Cinematic (Unlocks the ending) – Mia gets the virus, heartbroken – Yabahuaca massacred by the cartel because of the virus – Jake’s expedition in Omega camp, going insane, getting amnesia – Leaving before the expedition, seeing Mia in ventilation Ending Neutral and Bad ending, depending on if the player finds the cure for the virus or not. Green Hell’s events, sequenced by chronologics or gameplay Please navigate the following database by scrolling horizontally and vertically. Change the sequencing style with the droplist above the table. The pros and cons of scattered environmental storytelling Prior to Green Hell, I experienced strong environmental storytelling in The Witcher 3 (open-world) and the Bioshock series (linear). From my point of view as a player, it has the following benefits: Accessibility. The player doesn’t have to follow a pre-arranged sequence and is free to visit them at any point. Efficiency. Environmental storytelling can be mass-produced modularly in the

Politics in Business: Port Royale’s Staggering Economic Systems

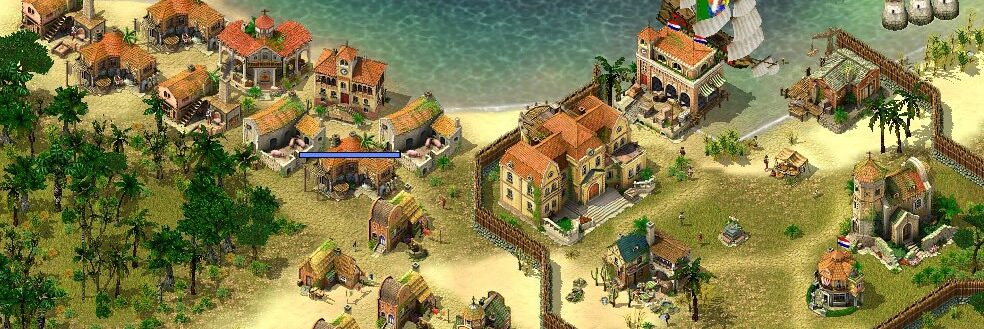
1300 words | 3 minutes Around fall 2020, when our new Game Design professor Alexander King introduced us to the system design world, I became interested in strategy games and trading games. I’m normally not a number person, but I still did the maths to beat the game. After spending 25 hours playing Port Royale, I spent another couple of hours reviewing my gameplay and summarizing the intriguing economy systems in the game. Overview Port Royale 2 is a real-time strategy game of real historical events inspired background stories. The story happened in the Caribbean colonial island in the 17th century, and the player, being a small ship’s owner, will be doing trades and other profitable actions under this chaotic and intense political situation, in order to make as many profits as possible. There is no maximum nor minimum number of a player’s assets, hence there is no clear winning/losing state of the game. However, very similar to incremental games, with more assets the player has, more game content will be unlocked, driving the player to seek more profits. The game has an extremely complicated system, with dozens of noticable flows. Stage 1: Horizontal growth and buy-and-sell economy The game starts with most of the player activities unpermitted by the government, so the player will get familiar with the game in a rather simple system: The player travels between towns, buys cheaper items, and look for another town where the price of the item is higher. The bigger amount of one product a player buys from a town, the stock of that product in the town decreases, and the price will be increasing dramatically. The same rule applies to selling items: The more you sell to a town, the less you earn from each trade, due to the shrinking of demand. This is one of the core mechanics of the game. It’s inspired by real-life trading, and can prevent players from spamming trades repetitively. However, the stock and pricing system in each town is are not totally dependant on the player’s actions. There are AI ships, plantations, and factories in each town, generating a varying amount of stocks; there is also a population value in towns that consumes these goods. With each town having its specialties of production, the player can memorize the best locations to purchase different items, and hence figure out an optimal trading route. The more cash the player has, the more valuable products the player can buy and sell, making even more profit. The player will grow horizontally in the market, until its stock covers every type of product. Sailing around and trading is rather risk-free and easy to learn, but the productivity is very limited due to the unpredictable prices in each town, and the maximum storage on the player’s convoy. In order to make more profit, besides buying more ships from the shipyard, the player can produce its own goods by building in towns. Stage 2: Vertical growth and Produce-and-sell economy Before building in a town, the player needs to purchase permission from the authority, which will be more expensive as more permissions are bought. Besides cash, the building will also cost wood and bricks, which could be bought in as goods. After inducing labors, building a residential area, a warehouse, and a production building, the production process will start automatically. Usually, the player needs to start with a primary production estate, and then move to the secondary industry. Since each town only has certain types of buildings available to construct, the player will eventually need to expand into multiple towns, and constantly transfer goods between them. For example, Cartagena is a garment-producing town, and Santa Marta is a cotton-producing town. If the player wants to produce a large number of garments, a crossover industrial chain between the two towns is necessary. With this chain of production, the player can achieve vertical dominance in the town’s market. Just like in real life, producing one’s own goods is always more profitable than buying from other merchants. The ones being both the supplier and the retailer can always make money than either of these two. After the player has enough total assets to level up, the governor will be happy to talk to you and give you tasks, out of which some are war-related, and some are not. Normally, a player would not immediately purchase the letter of marque and start sea battling, because a large number of sailors, ships, cannons, weapons, and ammo are required in the convoy to win a battle, not to mention the disastrous result of losing one. Starting off with more peaceful tasks, such as negotiation, looking for survivors, and supplying selected towns with goods, the player can gain lots of rewards, plus the reputation needed to hire sailors. Stage 3: Battling and plundering After all the necessary gears for a sea battle are purchased by the player, it will be the time to start conquering. With permission from the letter of marque, the player is able to attack weaker convoys of enemy country’s convoys, claim their properties, and collect governmental rewards. However, the battle needs lots of experience, since the controls have made it incredibly hard to aim and dodge. Winning a sea battle is a huge boost to the player’s total assets worth, but losing a battle could also be a nightmare. The player will lose all the ships involved in the battle, which in most situations means losing most of the property. Sea battles are good ways to boost a player’s financial status. It’s also essential for future developments since enough enemy slew will give the player permission to attack and claim an enemy country’s town. In order to successfully defeat the original armies in the town, the player’s convoy needs to be very massive and well-equipped. Attacking governmental towns is almost impossible, but smaller towns are generally easier to conquer. With fewer benefits too, of course. Stage 4: Automatic profiting Claiming a town will generally take